
Oh...but I do have such a soft spot for *fashion*. Doesn't every girl LOVE fashion and all the pretty things out there? But, yeah, I don't have the budget for the big designer names. Soooo....I make my own! Please come along as I show you how to make this GORGEOUS shirt...or one just like it :)
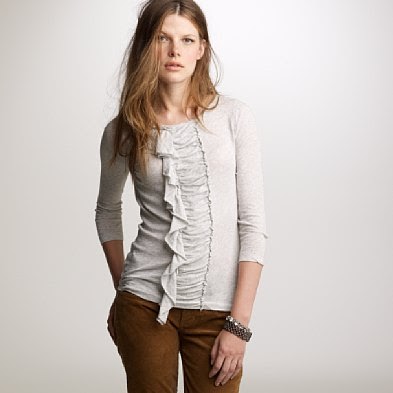
Taken from the J Crew...originally $42.50!

Made by me....for $7.00!!!
SUPPLIES:
-A long sleeve tee, preferably a jersey cotton so you don't have to do seams and not worry about fraying (you can get a new one, but this would work well with an old one you're bored of or is stained down the front)
-sewing machine
-thread :)
-pins
-scissors
Easy ,so far right?
So, you take your long sleeve tee...and cut of the sleeves (NOTE* I chose to cut of the sleeves because I don't mind making it short sleeved, but if you wanted to keep 'em, you'll be needing a second shirt of the same fabric to cut up for the ruffle part)

This is what you'll have after cutting...

Next, you cut of the sleeve hem...this part here in the picture...

Once you've done that, fold it in half...

Then, you're going to cut the sides edges so that you'll have a even shaped rectangle...
Here, I've already cut the opposite edge...

Open them up and you should have this...

Okay, now RIGHT SIDES together and pin at ONE end...do that to both...
You'll now have this...

Sew along the edge where you've placed your pins...

You should now have this....remove pins...

And open, laying flat, seam part down...

Set your machine at the longest stitch length...

And all the way UP either edge of one strip and up only ONE side for the other...
See, here...the one on the right has been sewn up both edge (kinda like a hem) making it all bumpy like that. The one on the left, has been sewn up only ONE side...allowing the other side to lay flat.
NOTE* For the one where you'll only sew one side...sew it on the RIGHT edge...WRONG SIDE DOWN.
Leave a piece of long thread when you finish sewing up sides.

You then take the long thread you left and pull on the one that gives more easily. Just play around with it till you get it...it doesn't have to be neat.

It should be bunching up, like so....

This is the one with the one sewn side...I cut scallops into the side NOT SEWN...to make it prettier....
gather this one like I just mentioned...

This is what you should end up with...
The left one looks like a "C" shape because, we only gathered and sew one side :)

Place on shirt...you can tell that right now it's too short...

Fold the top part of the ruffled piece...attach with pins...and then begin CAREFULLY and SLOWLY...pulling at the fabric to make loosen the gathering, therefore, creating a longer piece of fabric...

When you've done that...it should look like this...make sure you arrange the gathers to look the way you want them, so there are no gaps or flat parts...

Pin on the right side of gathered fabric....like so...

Take your other piece of fabric (the "C" shaped one), lay it on shirt....hmm...too small...but you know what to do!
Slowly and careful, loosen gather and stretch out the fabric to make it longer...

When it is the size of the front of the tee, slide it UNDER your un-pinned side...the gathered section should be what's showing...making it look like the ruffles are part of the whole thing...

See how it's UNDER the main piece?

Pin it down being careful to get the ruffled piece properly aligned with the top gathered piece.
Only the top piece should show. So hide that ruffle gather underneath!

SEW! Start at top corner...

Then turn and go all the way down...basically sewing a rectangle to secure the gathered piece and ruffles all at once. Finish at the corner you started...securing well. Snip. Cut. Done.

It should look like this when done...

See how pretty?

And that, my dears...is it! A brand new shirt in 30 mins! That is, if you can get away from the kids that long!
Hope you liked it! Enjoy!
Oh and don't forget to check me out at:


that's a really cute shirt!
ReplyDeletefollowing you from www.lifewiththechambs.blogspot.com
come visit me! :-)
This is a super cute shirt. Very nice job!
ReplyDeleteLove you blog, I'm following you..
ReplyDeleteBarbara
http://couponscouponsandmorecoupons.blogspot.com/
Thanks for the love all! I have more tee refashions over at my blog...
ReplyDeletehttp://dthatssewme.blogspot.com
I'm heading your guys way now!
Dorian