Showing posts with label craft project. Show all posts

Thursday, August 4, 2011

New kitchen additions

Little by little I have made a few changes to my kitchen. Since upgrading counter tops is not an option right now, I have focused on a few little changes. When we built our house I would say my style was very traditional, but now I'm not sure what to call my style. I think it's a combination of modern, a bit of retro, and a dash of vintage. Does that even make any since? I'm not sure, but that's the best description I can make.


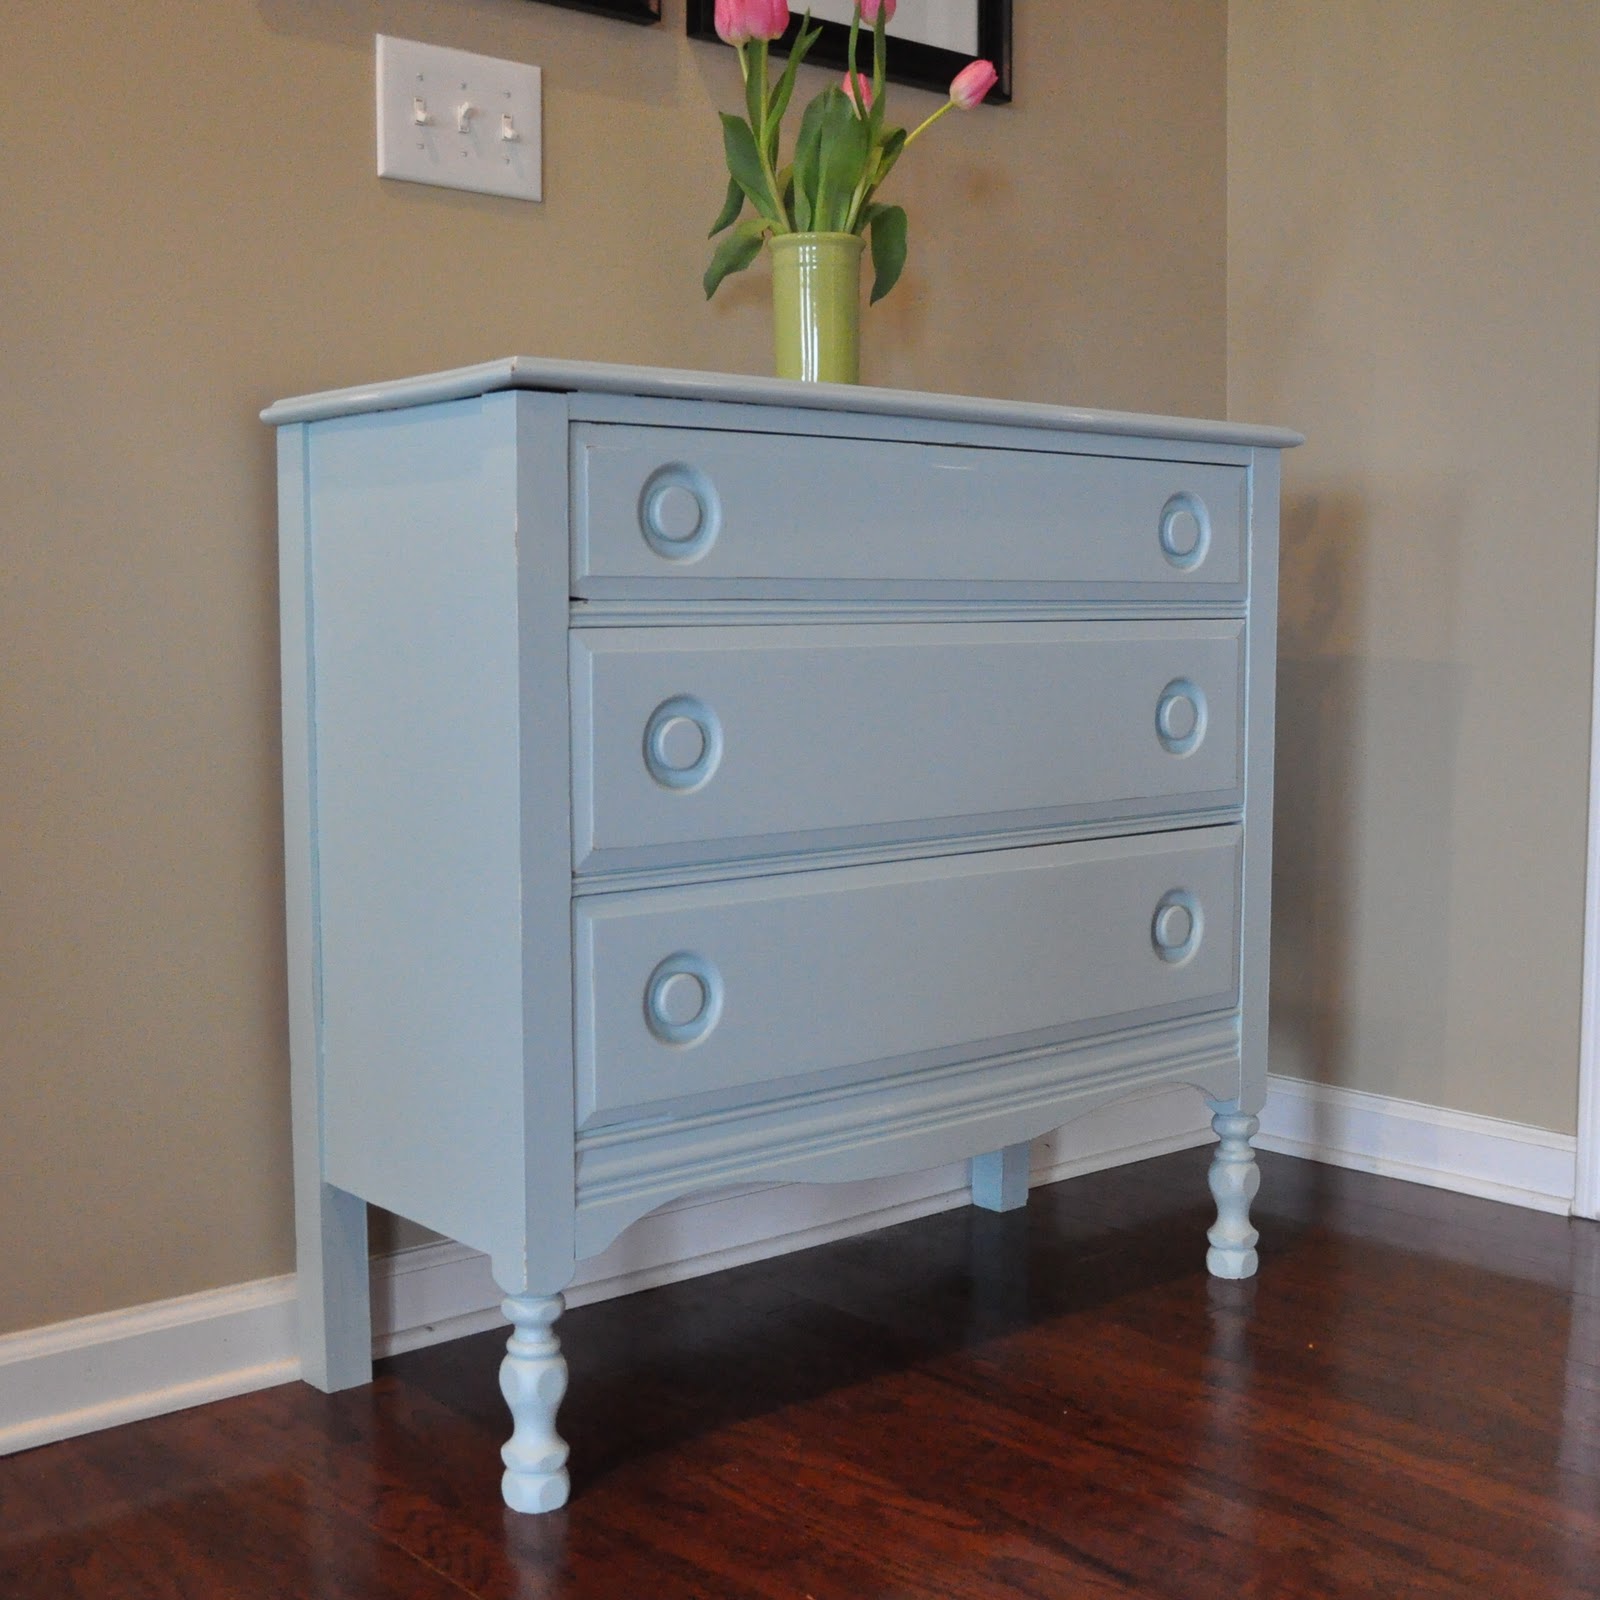
Originally I had a bakers rack that didn't really fit in with what I wanted anymore. My original thought for the space was a buffet, but when all the ones I wanted were $500.00+, I decided to go with something else. I looked at several local antique stores, but never really found what I was looking for. After a few weeks of searching, we went to visit my mother in law. They had recently moved and didn't have the space for this desk. It was the perfect size and price (free). All it needed was paint/hardware and VIOLA!


I tried to do my own version of a wall collage. I loved my silhouettes that I printed on green cardstock. You can see my tutorial on how to make silhouettes in photoshop elements here. I also chose a couple of coordinating fabrics to hang in my hoops. I have seen that on several other blogs, and loved how simple and inexpensive the idea was. I decided to refurbish an old photo frame that held three photos, with wrapping fabric around some cork board that I had. I will be a great place to stick notes, maybe a honey do list. :)

You can see how I transferred my photo to my canvas here. This is another very fun and inexpensive project.


These are just a few decorations that were added around the kitchen. The vintage scale is my favorite. I plan on using it in some future infant photo shoots, but for now it works great in my kitchen.


My husband was given the above chair and the chair in front of the desk by his grandfather. They meant a lot to him and I was very happy with how well they worked in the kitchen. I was also happy they didn't need any work. I considered painting them but my husband was not happy with that idea. I guess I can let him have his way just this once.

Thanks for stopping by my blog.
Here are a few parties I will be linking to today


Wednesday, July 6, 2011

Abstract Art Project

I decided to try my hand at another art project. Since I am no artist this project seemed perfect for me. I found this abstract art project on one of my many visits to Pinterest. I love how each one is unique.


I chose a 12x12 canvas for this project, but you could use any size you like. I used 1" painters tape and placed it randomly all over the canvas. You could use masking tape if you have that on hand.


Be sure to extend the tape over the edges of the canvas so you will see the pattern on the sides. Now you are ready for the spray paint. You may need two coats.


When you pull the tape off you have fun stripes. How easy is that?

Thanks for stopping by my blog.

Thursday, June 23, 2011

Making a Silhouette with Photoshop Elements {Tutorial}

I hope everyone is having a wonderful beginning to Summer. We have been so busy around here with swimming trips, outside play time, yard sales, two year old tantrums, etc. I wanted to take a little break from that and share a little project I did. I have plans on changing some things up in my kitchen, like painting, and some new decor. I'm really excited about it. My kitchen has not had any updates in seven years, so it's time. While blog stalking the other day I saw the post by Jessica at Happy Together. It was an awesome chalkboard wall, but while scrolling down she posted a few other Pinterest finds. I loved the wall of silhouette's by Laura Winslow Photography. I have just the place for it in my kitchen. I have made these in the past the old fashion way. I just printed a profile picture and traced it onto black paper. That worked fine, but was a lot of work for more that one silhouette. I decided to use my Photoshop Elements to make things a little quicker.

I will warn you that this post may be a little long with several screen shots, but I always do better with tutorials with lots of explanation and photos. If you are not real familiar with your Photoshop program this my be a good way to learn a little more about it. I have yet to grasp everything this program is capable of. If the screen shots are not big enough you should be able to double click on them to see them bigger.


First choose a profile picture. If you are making one of a girl/woman you may want to have the hair up. It makes the silhouette better in the end. Open the photo in your program. Go to your full edit workspace. Next your will want to make a duplicate of your background photo. You can do this by right clicking on the little photo on the right of your screen, and chose duplicate image.


Now, under the drop down arrow right above your duplicate image, you want to choose "vivid light".


At this point the coloring in your photo should have changed a little. Don't freak out, this is how it's supposed to happen. You can now flatten your duplicate image by right clicking on it, and choosing flatten. 


Now choose your magnetic lasso tool to trace around the head and neck of the photo. When you are finished double click and you should see marching ants where you traced.


It's time to fill the image by right clicking where your have traced and have the marching ants. You will choose "fill selection". Under contents choose black.


Now you should feel like your getting somewhere. Next, click "select" and then "inverse". You should now see marching ants around the frame of your photo.


Lastly, you go to "edit" and select "delete". You should now be left with your silhouette.

How fun and long was that! It seems like it takes a while at first, but after a couple it takes no time at all. Thanks so much for checking out my blog. Let me know it you have any questions. I will try my best to help.

Wednesday, March 2, 2011

Reverse Stencil Tutorial

I decided to try my hand at something new... art. I am no artist but I recently saw a reverse stencil on Homemade By Jill, and thought I would give it a try. The possibilities are endless with this project. At first I was going to use the bird from my Storybook Cricut cartridge, and cut it out in vinyl. Then I decided I liked the bird from Picnik better. There I go again with my love for Picnik. Since I couldn't print that with my vinyl, I did it the old fashioned way. I printed it off, cut it out, and taped it to my canvas. I know that doesn't sound very artistic, but it works.


You only need a few supplies for this project:
Canvas (Whatever size you want)
Foam brushes
Paint (you only need one if you don't mind a white background)
Mod Podge (Optional)


Since I am using to colors, I started by painting the whole canvas blue. Let it dry completely before your next step.


After your first round of paint dries. You are ready for the next step. I put the bird I used for my project above. If you are not familiar with Picnik, you can save it to your computer, and print it. I wanted the sides of my canvas to be the same as the bird, so I used painters tape all around the edges. I used painters tape to tape the bird, but the legs were a little trickier. I had to hold them down and paint over them slowly. You will get paint on your fingers, but acrylic paint comes off easily.


Next, I painted the over the bird in brown. Before it dried I peeled the bird off, and the painters tape around the edges. Now I have a cute little art piece, that was very simple to do.


Thursday, February 24, 2011

A Few Living Room Upgrades

I am so excited to share a few little projects that I have been working on this past week. I'm getting ready to have people over for my kids 2nd birthday, and wanted to make a few changes to the house. I really haven't changed much since we moved into our house 6 years ago. We built it, so it was exactly how I wanted it. When the kids came along my world revolved around them and what they needed, and it showed in my house. When you have twins, it's double everything. My house was taken over for a couple of years. Things have gotten much better the past few months, so I thought it was time for some changes. I have started with my living room. I found some cute fabric at Joann's for 40% off. This was my first time at making curtains, so I went simple with tab tops. I'm very happy with how they turned out.


The next upgrade I made was to an old dresser that I have had for many years. It was mine as a child and has been in my attic for a while. I decided to fix it up a bit with a little love and a coat of paint.


I decided to go with the blue that was in my fabric. I found a good match in a Sherwin Williams paint called Watery. The dresser had been white for as long as I could remember, so it was a nice change.


When the dresser was done it looked a little alone on my entry way wall, so I decided to add some picture frames. I decided to try something new. I used 11x14 frames and cut poster board to fit. I then added a 4x6 photo to each frame. I used removable tape, so it would be easy to change them out. I think it turned out pretty cute.


I think it really brightened up my livingroom. My next upgrades will be to my kitchen and bedroom. I haven't told my husband yet but I would love to change the paint in my kitchen, but he hates to paint. For some reason he can take a car apart and put it back together, but he hates to paint. It doesn't make since.

Thanks so much for visiting my blog.

Monday, January 24, 2011

2nd Birthday Party Preparation

My twins 2nd birthday party will be in March, and the preparation is taking over my craft space. It will be a pirate/princess theme. I have decided to only make a few homeade items this year, because I went a little overboard last year. I was so exhausted after it all, that I didn't sew or scrapbook for a month. I decided to make their outfits and birthday banner, then purchase the rest from a party supply store. I thought I would share a couple of things that I have finised.

I stated by cutting 3" triangles, and used my pinking shears to make the zig zag look on the edges.


I used my Cuttin up Cricut cartridge to make my letters, and my Story Book Cartridge to make the crown. I had to google image a jolly roger, but I like the one I found.


For my sons shirt I found a larger google image of a jolly roger, printed, and cut it out. I cut it out in white felt, and sewed around it. I liked the rugged look of it. He will be a cute pirate.

I will be back this week to show the dress I will make for my daughter, and maybe a few other things I've been working on.

LinkWithin

Related Posts with Thumbnails