Now, for my second, Lets Hear It for the Boy, t shirt project. My original thought was to make a Superman shirt, but then I decided to personalize it. My sons name is Tristan, but everyone calls him T. So, it seemed fitting to make him a Super T shirt.
Supplies:
Shirt: ($2.99 Hobby Lobby)
Knit Fabric: ($9.99 yd. at Joanns. I used two colors. You could use old t shirts if you have the right colors.)
Embroidery Floss: ( .39cents each I used two colors)
Embroidery Hoop: (Optional)
Velcro: ( $1.50 pack of 3 squares Hobby Lobby)
Personalized letter: ( I just freehanded a block letter and cut it out)
Coordinating thread, Scissors, and Sewing Machine
My first step was pinning the letter to my fabric and cutting it out. I cut the bottom fabric a little bigger than the letter pattern, and cut my top fabric the same size as the pattern.
Next, I pinned and straight stitched around both letter layers. I have only used knits a few times, but I love that they don't fray.
The next step is a fun little addition to the applique. It is optional, if you just want to sew it and leave it. I just thought it made the applique pop. For this step I used two embroidery floss colors, and my embroidery hoop to stabilize it while sewing. I got the floss idea from Dana over at MADE which you can find here.
To make the cape, I cut the knit the length and width of the shirt. To make it look more like a cape and not a square, I cut around the shoulders and neck. Again, using knit was nice for this project, because I didn't have to hem all around the cape.
I wanted to be able to take the cape off for washing, so I used velcro. You could just sew it on if you prefer, I just found this easier.
I decided to add a little floss to the bottom corners of the cape. I just thought it looked cute.
I hope you enjoyed my last two boy projects. I hope to have more soon. Thanks for stopping by my blog. If you have any questions please leave them in my comments and I will try my best to help.
Friday, March 25, 2011
Batman T Shirt with Tie and Suspenders {Tutorial}
In my next two posts I will be sharing two fun boy t shirt ideas. If you are a regular follower you know I have only posted a few boy ideas, and that has always bothered me. My poor little guy doesn't get as much hand made stuff as my daughter. So, when I saw the Lets Hear It for the Boys contest over at I Am Momma Hear Me Roar, I was instantly motivated.
The first shirt I thought I would try was the Batman with a tie applique and suspenders. It's fun, different, and very simple. I have a tendency to use lots of pictures for my tutorials, so bare with me.
Supplies:
T shirt: (I used black from Hobby Lobby $2.99)
Batman Fabric: (1/2 yd - 1yd Joanns $8.99 yd I was able to get mine 30% off)
1 yd of ribbon: (I used coordinating grosgrain yellow)
D rings: ($1.99 4pk at Joanns)
Steam a Seam
Tie Pattern: (I have a printable pattern below for a size 2T. You can shrink it or make it larger with your printer.)
Coordinating Thread, Scissors, Iron, and Sewing Machine
The first shirt I thought I would try was the Batman with a tie applique and suspenders. It's fun, different, and very simple. I have a tendency to use lots of pictures for my tutorials, so bare with me.
Supplies:
T shirt: (I used black from Hobby Lobby $2.99)
Batman Fabric: (1/2 yd - 1yd Joanns $8.99 yd I was able to get mine 30% off)
1 yd of ribbon: (I used coordinating grosgrain yellow)
D rings: ($1.99 4pk at Joanns)
Steam a Seam
Tie Pattern: (I have a printable pattern below for a size 2T. You can shrink it or make it larger with your printer.)
Coordinating Thread, Scissors, Iron, and Sewing Machine
After getting my tie pattern cut out I used the negative version to line up where I wanted to cut. As you can see in the above photo, I wanted to the bat and the word Batman to be on the tie. When I was happy with the placement I used my rotary cutter to cut it out.
When I had my tie cut out, I was ready to place it on my shirt. I also took my yard of ribbon and cut it in half for the suspenders. I did have to trim a little at the bottom the make it even with the shirt. I used Steam A Seam to hold the tie and ribbon in place for sewing. You can use the full sheets or the strips. I had both, but either would work for this project.
Before ironing on the ribbon, I placed my D rings under the ribbon. I then ironed on the ribbon and the tie.
Next, I cut strips of fabric to place over my ribbon. This is optional, you can just leave the ribbon. I just liked the idea of having the words Batman down the suspenders. I then folded the edges, placed Steam A Seam on them and ironed them on the ribbon.
My last step is to sew it all together. The Steam A Seam will hold it all together if you don't want to sew it, I just like the looks of the sewing. I used a straight stitch down the edges of the suspenders, and a zig zag stitch around the tie.
*Note: Be cautious of sewing around the D rings. I sewed up to the ring, stoped, then cut threads and started again. You will break a needle sewing over them.
Now you have a fun shirt, that I'm sure your little man will love. Thanks so much for stopping by my blog. If you have any questions, please leave them in my comment. I will help any way I can.
Wednesday, March 2, 2011
Reverse Stencil Tutorial
I decided to try my hand at something new... art. I am no artist but I recently saw a reverse stencil on Homemade By Jill, and thought I would give it a try. The possibilities are endless with this project. At first I was going to use the bird from my Storybook Cricut cartridge, and cut it out in vinyl. Then I decided I liked the bird from Picnik better. There I go again with my love for Picnik. Since I couldn't print that with my vinyl, I did it the old fashioned way. I printed it off, cut it out, and taped it to my canvas. I know that doesn't sound very artistic, but it works.
You only need a few supplies for this project:
Canvas (Whatever size you want)
Foam brushes
Paint (you only need one if you don't mind a white background)
Mod Podge (Optional)
You only need a few supplies for this project:
Canvas (Whatever size you want)
Foam brushes
Paint (you only need one if you don't mind a white background)
Mod Podge (Optional)
Since I am using to colors, I started by painting the whole canvas blue. Let it dry completely before your next step.
After your first round of paint dries. You are ready for the next step. I put the bird I used for my project above. If you are not familiar with Picnik, you can save it to your computer, and print it. I wanted the sides of my canvas to be the same as the bird, so I used painters tape all around the edges. I used painters tape to tape the bird, but the legs were a little trickier. I had to hold them down and paint over them slowly. You will get paint on your fingers, but acrylic paint comes off easily.
Next, I painted the over the bird in brown. Before it dried I peeled the bird off, and the painters tape around the edges. Now I have a cute little art piece, that was very simple to do.
Thursday, February 24, 2011
A Few Living Room Upgrades
I am so excited to share a few little projects that I have been working on this past week. I'm getting ready to have people over for my kids 2nd birthday, and wanted to make a few changes to the house. I really haven't changed much since we moved into our house 6 years ago. We built it, so it was exactly how I wanted it. When the kids came along my world revolved around them and what they needed, and it showed in my house. When you have twins, it's double everything. My house was taken over for a couple of years. Things have gotten much better the past few months, so I thought it was time for some changes. I have started with my living room. I found some cute fabric at Joann's for 40% off. This was my first time at making curtains, so I went simple with tab tops. I'm very happy with how they turned out.
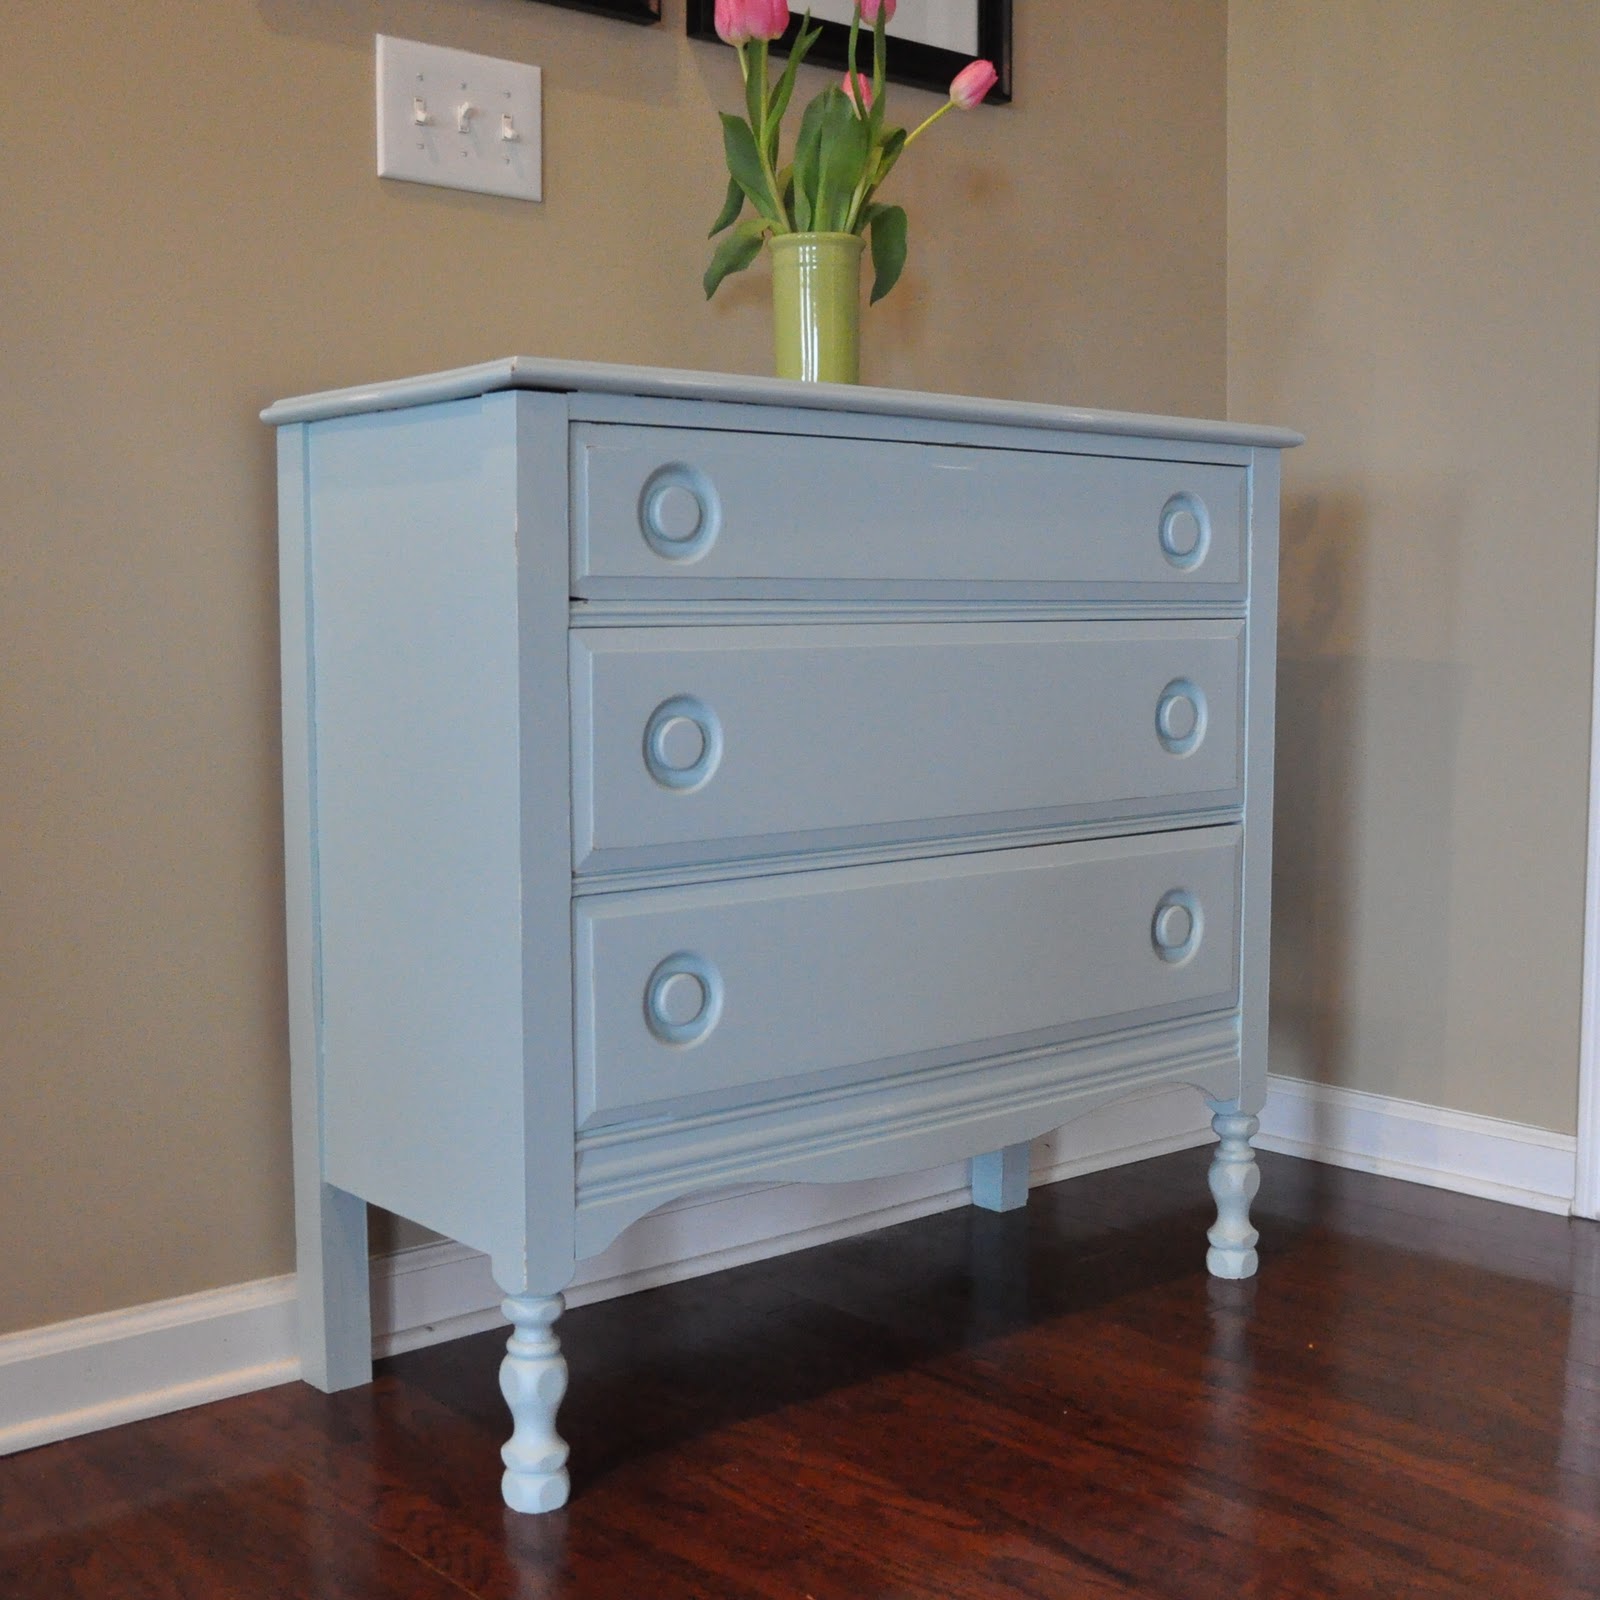
The next upgrade I made was to an old dresser that I have had for many years. It was mine as a child and has been in my attic for a while. I decided to fix it up a bit with a little love and a coat of paint.
I decided to go with the blue that was in my fabric. I found a good match in a Sherwin Williams paint called Watery. The dresser had been white for as long as I could remember, so it was a nice change.
When the dresser was done it looked a little alone on my entry way wall, so I decided to add some picture frames. I decided to try something new. I used 11x14 frames and cut poster board to fit. I then added a 4x6 photo to each frame. I used removable tape, so it would be easy to change them out. I think it turned out pretty cute.
I think it really brightened up my livingroom. My next upgrades will be to my kitchen and bedroom. I haven't told my husband yet but I would love to change the paint in my kitchen, but he hates to paint. For some reason he can take a car apart and put it back together, but he hates to paint. It doesn't make since.
Thanks so much for visiting my blog.
The next upgrade I made was to an old dresser that I have had for many years. It was mine as a child and has been in my attic for a while. I decided to fix it up a bit with a little love and a coat of paint.
I decided to go with the blue that was in my fabric. I found a good match in a Sherwin Williams paint called Watery. The dresser had been white for as long as I could remember, so it was a nice change.
When the dresser was done it looked a little alone on my entry way wall, so I decided to add some picture frames. I decided to try something new. I used 11x14 frames and cut poster board to fit. I then added a 4x6 photo to each frame. I used removable tape, so it would be easy to change them out. I think it turned out pretty cute.
I think it really brightened up my livingroom. My next upgrades will be to my kitchen and bedroom. I haven't told my husband yet but I would love to change the paint in my kitchen, but he hates to paint. For some reason he can take a car apart and put it back together, but he hates to paint. It doesn't make since.
Thanks so much for visiting my blog.
Monday, February 14, 2011
Valentines by Picnik
I hope everyone is having a great Valentines day. I decided to make some last minute Valentines, for my husband, from the kids. I used the Picnik program. I love using this program, it is so user friendly. I use it more than my Photoshop for quick projects. I just thought I would share these with everyone. I will be back this week with a sewing project, and a few more additions to the upcoming birthday party.
Monday, January 31, 2011
Blog Face Lift/ Now Advertising
I don't know about anyone else, but I'm ready for a season change. I have a bad case of Spring fever. I've started my spring cleaning around here a little early, and getting ready for yard sale at the first sight of warm weather. My motto this week is out with the old, and in with the new. I am including my blog in that, with a little face lift. I designed the header and buttons on Picnik. I love how simple this program is to use. You can use most of the gadgets for free, but can upgrade for a small cost.
I also added a PR Friendly/Advertising tab at the top of my blog, if anyone is interested.
I hope everyone is having a great start to their week. Thanks for stopping by my blog.
I also added a PR Friendly/Advertising tab at the top of my blog, if anyone is interested.
I hope everyone is having a great start to their week. Thanks for stopping by my blog.
Thursday, January 27, 2011
Princess Dress and Pirate/Princess Birthday Invitation
I wanted to share the newest additions to my kids birthday party extravaganza. This post really reflects my love for etsy. I really believe I can find everything I need on that sight. First I want to share the princess dress that I made my daughter. I sadly cannot claim the design as mine. I purchased the PDF pattern from an etsy store called Fabric Boutique. If you have never purchased a PDF pattern from etsy, you should check them out. There are several stores that sell them for a very reasonable price.
The fabric that I used was Amy Butler {Rowan}. I have had it for a year, and could not find a project worthy enough for me to make that first cut. Does anyone else have that problem? I have several fabrics like that. I thought it would be a perfect pattern for my daughters princess dress. In the picture you can see the leggings she had on underneath, just ignore those. She was not a very willing participant in getting a picture today.
These are the invitations that I will be sending out to friends and family soon. I had these made by another favorite etsy store called Silly Me Design. I used this store last year for their first birthday invitation and loved them, so I had to go back again this year. When you are dealing with boy/girl twins, you have to get creative, and she did a great job with it. I would highly recommend checking her store out.
The fabric that I used was Amy Butler {Rowan}. I have had it for a year, and could not find a project worthy enough for me to make that first cut. Does anyone else have that problem? I have several fabrics like that. I thought it would be a perfect pattern for my daughters princess dress. In the picture you can see the leggings she had on underneath, just ignore those. She was not a very willing participant in getting a picture today.
These are the invitations that I will be sending out to friends and family soon. I had these made by another favorite etsy store called Silly Me Design. I used this store last year for their first birthday invitation and loved them, so I had to go back again this year. When you are dealing with boy/girl twins, you have to get creative, and she did a great job with it. I would highly recommend checking her store out.
Subscribe to:
Posts (Atom)