Friday, July 30, 2010

Fabric Sunglasses Case Tutorial


I think everyone with kids knows what it is like to carry around a huge diaper bag and lose things inside. I can never find my keys or my wallet, but my biggest problem is my sunglasses. They don't just get lost they get scratched. I've wanted to make a cute case for them for along time and was excited to find a tutorial on My Blonde Ambitions. I did change a few details to fit my needs and to use what I had lying around.

I started by cutting my cotton fabric and Flannel (you may also use fleece) 6 inches wide and 18 inches long. You may want to measure your glasses and cut the fabric accordingly. These measurement are what fit my glasses. I then placed my two pieces of fabric right sides together, pin in place, and sew around both sides and bottom leaving the top open.


After sewing you will turn your fabric right side out. On the opened end fold the edges in about 1/2 inch and iron.


Instead of sewing closed I decided to add stretchy elastic ribbon. I cut about 3 1/2 inches of the ribbon. I tucked and pinned it, before sewing it closed.


Using my glasses as a guide I folded my fabric to make a pouch. That helped me to decide where my button should go. I used a Dritz button covered in fabric. They are cute and inexpensive. You will have to sew the button on by hand. I then pinned both sides of the pouch and sewed it closed.


Now you have a cute and fun way to store your glasses, and I have a finished project to link to Sew and Tell Friday.


Sunday, July 25, 2010

Birthday mini album

My kids first birthday was back in March. Coming up with a theme was not to hard. I really love owls, and I thought that would be a good gender neutral theme. I bought the Story Book cricut cartridge and went to work. Needless to say when the party was finished I was exhausted, and took a little break from scrapbooking. I was really inspired by Ali Edwards website. I have always done 12x12 layouts. I have never really tried doing mini albums the way she had. I found it to be a lot easier when working with a lot of pictures.


I started with a album that opened and closed like a school binder. It was a reasonable purchase from Target for $7.99. It came with the plastic inserts that held 200 pictures. I put my pictures in categories. At the beginning of each category I made a little 4x6 card with journaling about the pictures that followed.


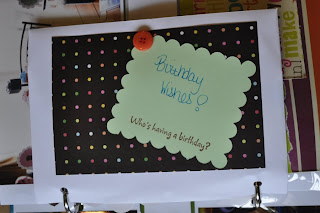
I tried to incorporate some of the smaller things I used for decorations, like the birthday wishes. This was the fun part about the album being like a binder. I embellished an envelope to hold the wishes and added it in the album.


I was also able to add some of the confetti from the decorations.


My favorite embellished card was the one with their candles and a cupcake wrapper that I added a little glitter to. I also stapled ribbon at the beginning of each category for easier access.


I ended the album with the birthday cards they received. I am really happy that I did the mini album. I'm not sure I could have decided what pictures to scrapbook. I hope everyone was inspired by mini album and tries one for themselves.


Tuesday, July 20, 2010

Fabric Flower and Ribbon Headband


I have lived in the south since I was three, and I can't really imagine living anywhere else. The one thing I have never gotten used to is the humidity that comes with the Summer months. I find myself wearing my hair in a pony tail most of the time because I can't get it to anything else. Were is the fun in that?

The fabric flowers are very easy to make and adds a little flair to your headband.

Supplies:
Wide Ribbon or Elastic Headband
Scrap Fabric
Needle and Thread
Rotary Cutter or Scissors


I Chose two coordinating scrap fabrics. For the bottom flower I cut a strip 17" long and 3" wide. For the top flower I cut a strip 12" long and 3" wide.


I twisted each strip of fabric and formed it into a circle. As you are forming your circle you will use your needle and thread to sew portions of it together.


You will end up with two circles of fabric. I stacked them and sewed them together onto my piece of ribbon.


Now you have added a little flair to that boring pony tail.

Saturday, July 17, 2010

Curtain rod turned ribbon organizer!


For months I've been looking for an inexpensive way to store my ever growing ribbon collection. It finally occurred to me that I have had a curtain rod hanging in our old guest room that we have not used since we changed it into a play room for the kids. I thought it was a perfect solution to my problem that wouldn't cost me anything. Curtain rods can be expensive, so you might not want to run out to get one for this purpose. If you have one around and a box full of tangled ribbon, you might as well put it to good use.

Tuesday, July 6, 2010

Refurbished Frame


This project is fun, easy, and inexpensive. It doesn't get much better than that. This frame has been in my attic for years with a broken glass. I decided to pull it out and make it a place to display pictures, and my to do lists.


Supplies:
Frame (any size)
Spray paint
Staple Gun
Ribbon


I took the back off the frame and removed the picture and glass. My fame had metal hooks holding the back on that I pulled out using pliers. Depending on the frame you use, you may not need that step.


I uses Krylon matte black spray paint. My fame took a couple of coats.


I used a staple gun to staple the ribbon on the back of the frame. I did two rows about 7" apart. This step you could easily change to make your project your own. I hope everyone enjoyed this super easy project.

LinkWithin

Related Posts with Thumbnails